October Meal Plan: The Comfort of Routine

I don’t have much to say tonight.  I almost didn’t post.  One of The Aunts, my Gramma’s sister, passed on today and I didn’t hear until just about an hour ago.  So I’m sad and thinking of her farmhouse among the maple trees sitting empty and lonely and wishing I’d been there more often in the past year to see her.

But it’s meal plan night.  And just as there’s order and comfort in having a meal plan on busy days or stressful days, there’s comfort in posting here for all of you.  It’s cold here tonight and the rain hasn’t let up.  I’m wrapped in a blanket and feeling how October is creeping in.  Things are very quiet.  And I’m looking forward.

Monday, 10/1: Whole-wheat pasta with chicken and broccoli
Tuesday, 10/2: Slow cooker: French-style pork stew and salad
Wednesday, 10/3: Buffalo lettuce wraps, fruit
Thursday, 10/4: Waffle iron panini
Friday, 10/5: Fend night

Grilled organic chicken sausages and vegetables — one of our favorite fend night dinners when there are no leftovers to be had.

Saturday, 10/6: Honey-mustard turkey and bacon bites, roasted vegetables
Sunday, 10/7: We’ll likely be out all day, so I’m employing the slow cooker again — Chicken stroganoff over egg noodles
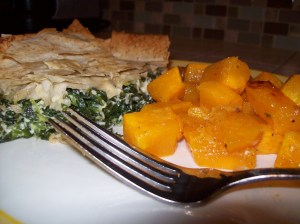
Monday, 10/8: Spanikopita casserole and roasted squash

Spanikopita casserole

Tuesday, 10/9: Slow cooker: Italian wedding soup
Wednesday, 10/10: Pizza burgers and salad
Thursday, 10/11: Breakfast for dinner
Friday, 10/12: Fend night
Saturday, 10/13: Make your own taco bar
Sunday, 10/14: Roast lamb supper
Monday, 10/15: Butternut squash and pear soup, cheese, bread
Tuesday, 10/16: Slow cooker: Chili and cornbread
Wednesday, 10/17: Shaved steak skillet
Thursday, 10/18: Farfalle with wild mushrooms
Friday, 10/19: Fend night
Saturday, 10/20: Chicken with goat cheese and marinara, gnocchi
Sunday, 10/21: Scalloped potato casserole with ham, vegetables
Monday, 10/22: Vegetable pad thai
Tuesday, 10/23: Slow cooker: French dip sandwiches, salad
Wednesday, 10/24: Pan fried ham steak and vegetables
Thursday, 10/25: Homemade chicken nuggets
Friday, 10/26: Fend night
Saturday, 10/27: Homemade whole-wheat pizzas

It was really fun when we did our pizzas with pictures on them. Maybe we’ll do that again…

Sunday, 10/28: Pot roast and mashed potatoes
Monday, 10/29: My mom will be in town and has promised to handle dinner.  Score!
Tuesday, 10/30: Slow cooker: Flank steak tacos
Wednesday, 10/31: Fun Halloween dinner!  We’re making stuffed peppers carved like jack o’lanterns this year.


Posted in Cooking, Feeding kids, Meal planning, Parenting | Tagged , , , , , , , , , | Leave a comment

Treats at School

After I wrote this year’s Halloween mantras — “The Post About the Treats” — I got a pretty nice response from several people who said that the philosophy J. and I adhere to these days, as far as all that sugar goes, either a) makes sense to them; or b) is close to what they already do in their own homes.  I have to admit that in a world of switch witches and Great Pumpkins and dentists buying candy back from young patients, it’s a little bit of an odd relief to me to hear that you all weren’t planning to disown me for letting L. and P. chow down on some good old-fashioned Halloween candy.  Not that I’d change my tune if I thought you would — but thanks for sticking around.

As I said in that post, it’s not really about strictly Halloween treats for us.  It’s about ALL the treats.  There are a lot of sweets and a lot of junk food land mines out there every single day, which is something none of you need me to tell you; lots of bloggers and journalists and medical experts have spoken about it far eloquently than li’l ole me possibly could.  But as parents, we do need to make, oh, approximately four THOUSAND little choices every single week about what in the world we’re going to do in the face of all that temptation.  Heck, even Eve couldn’t resist the apple….and if only we were talking about APPLES!

It’s unfair, I think, to expect that children — and I’m talking particularly about LITTLE children here, since expectations obviously need to naturally scale up along with the age and development of our kids — will be able to manage their own junk food lust appropriately on their own.  It’s all well and good for us to point fingers at one another when we debate about the propriety of junk food in schools and classrooms and say that it’s the responsibility of each family to tell their kids what they expect them to do when offered the manhole-cover-sized cupcake or the dixie cup full of Munchkins without Mom and Dad around.  Ideally, I wish it could work that way.  But honestly, would YOU turn that down every single time?

I know some of you are saying, “Yes, I would.”  And to you, I say: You are a better person than I.  And a better person than most of the adults I know.

My office has a nice little tradition of celebrating birthdays with a once-monthly “Cake Day.”  Several different cakes from different bakeries are brought in, everyone sings “Happy Birthday” to the appropriate people, and we all eat a slice of something good.  I usually choose the cake from the all-natural vegan bakery, on the premise that it’s at least less processed than the other options, but I still eat a damned slice of cake each and every month.  Sometimes I ponder saying “no, thanks.”  But I don’t know that I ever have.  Cake is good, people.  Pure and simple.  Cake is good.

And if I can’t say no to some good old cake, then what right do I have to expect that my kids will?

It doesn’t mean I don’t try to teach them moderation or teach them to think carefully about their options before just blindly choosing to eat a sugary treat that’s offered (and certainly, with P.’s food dye allergy, we have to do more education on this topic than I even would have on my own).  It just means that I don’t expect them to live in a sugar-free bubble where they really believe that strawberries are just as much a treat as cookies.  Are strawberries as GOOD as cookies, or even sometimes better?  Yes!  Are they a special and wonderful sugary treat?  No!  They’re green-light food.  I’m not going to pretend anything else, and I know my boys are smart enough to have picked up on this fact, even if I do spend lots of time and energy trying to make kale seem as desirable as a cupcake.

I can’t possibly control every exposure they have to junk food outside our home — that’s out of my hands, ultimately.  But what I can control is figuring out how to raise them in that delicate balance of wanting, enjoying, and appreciating healthy food, while not feeling deprived, longing for what their friends have (at least, not too much or too strongly), or wanting to rebel against eating the healthy stuff because they feel stifled.  To that end, I’ve had to start rethinking the lunchbox treat.

Oh, I used to scorn the lunchbox treat.  I did.  I thought that if I was packing lunches for toddlers and preschoolers, then every bite should be as nutritious as possible — I was cramming vitamins and minerals and my own overachieving ways into every bit of food in their lunches.  I don’t think I was wrong (although perhaps I put a little too much pressure on myself to get it “just right”); but now that the boys are getting older, and L.’s in a bona fide elementary school setting with a real cafeteria and real opportunities to compare his lunches to those around him, I think I have to tweak things a bit.

See, even a really, really good kid like L., who tells me constantly that “You make really great lunches, Mommy” and loves to eat healthy food, will sometimes look to his left and see the cookies and fruit punch; look to his right and see the chips and fruit snacks; and look down in front of him at the carrot sticks and unsweetened applesauce and lose some of his enthusiasm for that food, no matter how much he likes it.  Even a great eater, when confronted with the shocking reality that he is in the probable minority of children at his school, will feel some peer pressure about eating kale and unsweetened yogurt when everybody else (at least in his estimation) is eating pizza Lunchables and Cheetos.  And — I think, at least — if we don’t throw these great eaters the occasional bone to keep them happy with the lunchbox experience, we run the risk of watching their interest steadily dwindle as their resentment about being the “different” kid, the kid with the “weird” food, grows.

That doesn’t mean that I advocate packing those Lunchables and Cheetos, by any means (although I did reach a compromise with L. recently about organic bunny-shaped macaroni and cheese for school, a formerly no-go food in our house).  What I do think is worth considering, though, is finding opportunities to put in what I might call “damage control” treats a couple of times a week, so your kid isn’t the only one who NEVER gets dessert or NEVER feels like lunch is a little extra-cool.  Damage-control treats are, ideally, things you feel are a reasonable compromise (like that bunny macaroni); that still don’t totally blow your family’s food values; and that your kid will view as special, or as a way of helping them fit in.

Small pieces of high-quality chocolate?  Win.  Organic fruit snacks without artificial dyes, in a tiny single-serve package?  Win.  Single-ingredient fruit leathers?  Win.  Small portions of homemade baked goods, like mini-muffins or an oatmeal cookie?  Win.  As long as you don’t send this stuff every single day — thereby diminishing the “specialness” of the treat, as well as possibly ruining the whole concept of treat-frequency in your house — a couple of these randomly placed in the lunchbox throughout the week will keep that old spark between you, your kid, and their lunchbox alive.  It’s like couples therapy for lunches.

Need damage-control treat inspiration?  These pumpkin custard blondies are so easy to make, an eight-year-old could probably do the bulk of the work without any help.  Moist, lightly sweet, and gently tasting of fall, they’re just the right answer at this time of year.

Posted in Accountability, Feeding kids, Food culture, Lunchbox, Parenting | Tagged , , , , , , , , , , , , , , , , | 2 Comments

Monday Menus: Weeknight Dinner Edition, Part I

I thought I was done with the Monday Menus, but you guys have pulled me back in!

Due to popular demand from the fans on the RRG Facebook page, I’ve decided to keep going with the Monday Menus theme for the time being — shifting my focus from lunchboxes to easy weeknight dinners.  My goal is to provide you, each week, with one or two solid family dinner ideas that you can make within less than 30 minutes on a hectic evening, without a lengthy list of ingredients, and with lots of flavor and crowd-pleasing style.  And, of course, we’ll try to make these suckers as wholesome as possible.  Man, this family dinner thing is COMPLICATED.

I’m kicking off our Monday Menus with a weeknight meal that was such a total, out-of-the-blue experiment that I never expected it to be the raging success it was.  This thing was so good that J. actually, quite literally, licked his plate.  I’m dying to make it again sometime soon, because there were NO leftovers, and I feel cheated of my fair share.  This, friends, is the Autumn Stir-Fry, which was pretty good in and of itself — but taken completely over the top by the Cheater Scallion “Pancakes,” which I only threw together in desperation upon realizing that I had neither rice nor quinoa in the house.

When you’re talking fast weeknight meal, stir-fry is almost always the right answer.  Add to that the fact that this particular stir-fry stretches less than a pound of meat to happily feed four people by bulking up with tons of good, colorful veggies, and it’s an even BETTER answer.  Then throw that all on top of a scallion “pancake” that’s made in mere minutes with refrigerator staples, and it’s like takeout-avoidance heaven.

Welcome to Monday Menus: Weeknight Dinner Edition!

Recipe: Autumn Stir-Fry with Cheater Scallion “Pancakes”

Posted in Cooking, Meal planning | Tagged , , , , , , , , | Leave a comment

The Post About the Treats

Every year around this time, as people’s thoughts turn to Halloween, I see a lot of questions floating around the internet.  What should we do about the candy?  Do we let our kids have candy?  Why can’t Halloween be done without candy?

I used to worry exclusively about answering the Halloween question in and of itself.  But this year, it’s become part of a larger issue for me, and one that I have come to a very deliberate decision about for our family.  It’s not about one day for us, nor should it be for anyone.  It’s about the treats.  It’s about what you do, what you believe, fundamentally, about the treats.  Not on Halloween, per se, but in LIFE.

There’s no one right way to do this.  Let’s get that out of the way with right off the bat.  Some people don’t really do treats, either on Halloween or in life, and that’s fine.  If that works for you and your family, more power to you.  Some people do lots of treats and think it’s just about short of criminal to deprive kids of their birthright to trick-or-treat and pass out in the delirious sugar coma that most of us enjoyed when we were children.  And you know what?  I’m okay with that, too.  Then there are, of course, various stances along the spectrum between the two.  All of which are basically fine by me.  Unless, of course, you’re being inconsistent.

What do I mean by that?  I mean this: If you don’t really do sweets and treats, ever, and you decide to allow your kids to enjoy Halloween to the fullest, you may be sending the kind of mixed message that will not only confuse the kids, but make your life harder later on when you try to rein it all back in.  On the other side of the coin, if you are a person who tends to be relatively lax about treats, but you decide to clamp down and start rationing the Halloween candy because it feels like a lot of excess, you are probably setting yourself up for a battle there, too.  Kids want to know where we stand on things, and the more power we give to a single day (like Halloween) or a single item or group of items (like treats), the more power that day or that item will have over them.

J. and I have struggled with the treat thing, to be honest.  We both grew up in households where treats were available to us on a daily basis, no big deal, though to varying degrees; J.’s brothers still joke about a “three-cookie limit,” which I guess felt restrictive at the time to a bunch of teenaged boys, while in my house there was an infamous “treat drawer” stuffed with all manner of dessert items, and my sister D. and I were allowed to choose something from that drawer twice a day.  Regardless, we both — J. and I — turned out to be people who, yes, enjoy sweets, but don’t feel the need to binge on them and don’t feel deprived if we don’t have them.

With our own boys, however, as we’ve endured struggles with L.’s weight throughout his early childhood (this is a problem that seems to be resolving quite a bit as he gets older; hopefully I’ll have conclusive updates about that soon), we’ve had a harder time figuring out just what to do with the treats.  Do we allow a small treat item each day, provided it’s in proportion to the rest of their diets; or do we try to limit treats to once or twice a week?  Or not at all, unless it’s a birthday or holiday?  Will a cookie a day set L. up for a lifelong weight battle?  Or will restricting things do more harm?

We’ve experimented with all of this, obviously, and we’ve realized the following truths that apply in our household.  They may not resonate for everyone, but they make sense for us.

1) If we restrict treats and only allow the boys a dessert item occasionally, they seem to value the dessert more.  They want it more.  They fixate on it, even.  And then if it’s just a cookie, it’s a huge letdown, because they’ve waited ALL WEEK to get a sweet treat.  Somehow, the amount of negotiation and obsession that happens around that one treat doesn’t feel worth it to me, nor does it feel like a healthy relationship with food.

2) If we let a small sweet treat be a part of their daily routines, it can truly be small.  A square of dark chocolate; a short mug of homemade cocoa; a single-serving packet of Annie’s bunny fruit snacks (which, yes, are a dessert in our house — they’re fine, but they’re just glorified candy, and we treat them that way).  These are not enormous desserts nor major compromises, but they do the trick.  Moreover, the boys are satisfied with a few little bites of something, they don’t ask for nor crave more, and there’s no drama.  There’s no POWER to the treat.  Thus, if we ask them at any point in time to forego a treat — because there will be a party the next day, or because we’re planning an outing where there may be an extra snack opportunity, or whatever — they’re generally okay with that.  They know that treats are regularly available to them, so they don’t feel the need to fuss about the issue.

3) So when it comes to consistency, Halloween doesn’t have to be a hard call for us.  We allow treats.  We have no reason NOT to allow treats on Halloween.  Our boys are used to small portions of dessert at a time, so they won’t be looking to gorge on their haul — they’ll be happy with a couple of little pieces of candy, and then we’ll put it away until the next day.

4) However, just because we “do” Halloween doesn’t mean there aren’t some limitations.  For P., obviously, being a dye-free kid will mean that we’ll have to have acceptable items to trade for his unsafe candy.  And for both boys, we generally limit the overall amount that they collect (by keeping a short-ish trick-or-treat route); and the amount that they KEEP of that haul (by letting them each sort through what they’ve collected and fill a jar or dish we provide to them with the ones they truly want to keep — when that’s full, they’re done).  Anything they don’t keep goes into the big candy dish and is “regifted” to the rest of the trick-or-treaters who come to our door throughout the night.

It’s a system that works for us.  And it works, frankly, because it doesn’t involve stress, negotiations, bargaining, or any kind of freaking out about treats.  We do choose, yes, to provide treats that we think are more moderate and slightly more wholesome, on a general daily basis.  But I’m not fooling myself, or them — a treat is a treat, and just because it’s “less bad” than a Twinkie, doesn’t mean it’s a health food.  So when an occasion like Halloween arises, and a moderate amount of mainstream candy comes into play, I feel okay about letting them indulge in small quantities.  Nothing’s forbidden, it’s still just a treat, and in the end, the “damage” that may be done by eating a few days’ worth of 3 Musketeers bars each year, without parental comment or freak-out, is probably far less than the “damage” we might do if we outright banned them from finding out what those 3 Musketeers bars are really all about.

The bonus of this arrangement happens to be, by the way, that while my kids are kids — and they certainly like all those Halloween sweets — they actually tend to PREFER the kinds of things we offer them more regularly.  They like their chocolate darker, their candies slightly less sweet, and they LOVE a good home-baked treat like these miniature pumpkin-chocolate chip muffins.  They greet these things with the same enthusiasm they’d show for a big fudge brownie or an ice cream cone.  I feel good because offering treats like these more often means that I can say “yes” to occasions like Halloween; they feel good because they’ve got chocolate chip muffins.  For now, it works.


Posted in Accountability, Feeding kids, Food culture, Parenting | Tagged , , , , , , , , , , , , , | 5 Comments

Monday Menus: Lunchbox Edition, Part VI

I can’t believe we’re done.

After six weeks of sharing lunchbox recipes with you, six at a time, I’ve reached the end of the series.  I’m not going to lie — it’s been tons of fun, and I’ve enjoyed it, but I’m kind of glad to see the finish line.

We’ve covered so much ground in the past thirty lunchboxes.  We started with Easy Bites, then moved on to Mini-Meals, Stuff in Other Stuff, Hearty and Handy fare, and Sandwich Style.  There have been waffles and crepes and meatball club sandwiches, salads and muffins and a few things that came on sticks.  And tonight, we’re moving in a totally different direction.  I’m leaving my beloved Lunchbots behind and pulling out that friend of the cool-weather lunch packer: The Thermos.

It’s starting to officially feel like fall in New England, and on chilly mornings as I walk L. to school, it feels sort of good to know that I’ve tucked something nice and warm into his lunchbox.  Having a thermos available really expands the repertoire of what you can pack for kids, and it’s especially handy for older kids who need a warm and substantial meal in the middle of the day.  You can pack so many things in a thermos that it’s likely none of you even need my suggestions to be able to fill one up with something good; but just in case, here are six relatively simple, kid-approved Thermos Things that would be just perfect for every member of the family.

On the menu:
Cheddar Quinoa
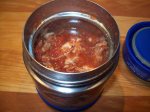
Spaghetti (squash) and Meatball Soup
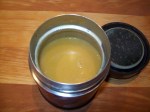
Quickest Pumpkin Soup
Pizza Chicken
No-Work Noodle Bowl
Green-y Tortellini

Posted in Cooking, Feeding kids, Lunchbox, Meal planning, Parenting | Tagged , , , , , , , , , , , , , , , , , , , | Leave a comment

Monday Menus: Lunchbox Edition, Part V

Here in RI, we’re just starting the third (well, okay, sort second-and-a-half?) week of school.  I’ve heard from readers whose kids have been back well over a month, people whose kids are just getting started, and everyone in between.  As for our lunch-packing series here on RRG, well, we’re heading into the home stretch.  In the past four weeks, I’ve shared Easy Bites, Mini-Meals, Stuff in Other Stuff, and Hearty and Handy fare.  Now that I’m posting my fifth consecutive Lunchbox Edition, I think it’s high time we got to the heart of the school lunchbox: the sandwich.

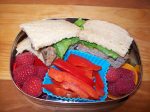
Yes, sandwiches are still a great lunch – in case you’ve been confused by all the non-sandwich fare I’ve shared here, or by pictures of amazing non-sandwich gourmet bento boxes on other people’s blogs and pages.  Lunch does not HAVE to be a sandwich, and most times, in our house, it’s not.  But that doesn’t mean that you shouldn’t pack them.  They’re a lunchbox classic for a reason, after all: they’re perfectly portable, endlessly customizable, and depending on what goes into them, they can be a complete, healthy meal unto themselves.

Today, though, we’re doing sandwiches with style.  I’m going beyond the PB&J and the ham and cheese to show you some fun twists on the sandwich that can spruce up any lunchbox.  Mainly, these are non-traditional — but they still fit the “sandwich” mold by being, basically, a filling stuck between two slices of bread (or something that stands in for the bread).  My kids loved these out-of-the-box interpretations, and hopefully yours will too.

On the Menu:

Mini-Meatball Clubs
Sweet Apple Quesadillas
Open-faced Bolognese Pizzas
Soft Pretzel Sandwiches
Roasted Pepper Phyllo Bites
Crispy Crepes

Posted in Cooking, Feeding kids, Lunchbox, Meal planning, Parenting | Tagged , , , , , , , , , , , , , , , , , , | 1 Comment

Monday Menus: Lunchbox Edition, Part IV

It’s hard to believe that we’re already halfway through my six-week series on lunch packing.  So far, I’ve shared eighteen new lunch ideas with you: six each in the Easy Bites, Mini-Meals, and Stuff in Other Stuff categories.  Hopefully, as the school year begins in earnest all over the country now, some of you will find things in these posts that will inspire you to feel great about packing lunches for your kids (or yourselves — we adults need to eat well too).

I keep hearing from people, though, who are concerned about feeding kids who seem particularly hungry.  Some of our kids will be fine with an apple and cheese and a few sides, but others — and P., my own 3-year-old, is often among them — appear to always need MORE.  Tonight I’m sharing lunch ideas that I think of as “Hearty and Handy.”  These lunches tend to be a little more filling, bite for bite, than many of their counterparts.  They’re no harder to prepare than anything else I’ve shared, but they’re substantial and, importantly, easy to pack and eat.  A ravenous, growing kid could eat one of these lunches and have enough energy to get through hard play at recess, afternoon classes, and even an after-school game in the schoolyard before looking for a snack.

On the menu tonight:
Turkey and Cheese Hand Pies
Chicken-Apple Waffles
Mediterranean (ish) Tarts
BLT Panzanella
‘Roni Salad
Taco Rice Salad

Posted in Cooking, Feeding kids, Lunchbox, Meal planning, Parenting | Tagged , , , , , , , , , , , , , , , | 2 Comments

Experimentation: September Meal Plan

The September meal plan can’t really be here.  It was NINETY degrees today, for heaven’s sake.  It cannot possibly be time to do this again, already.

And yet, here I am, faced with a calendar that stubbornly insists that yes, tomorrow is, in fact, the first day of the month.  So I’m writing a meal plan anyway, despite the fact that I strongly suspect the calendar lies.

The good news for you all is that I’m devoting this month, as well as likely an additional month or two after it, to cooking meals that will help me build a new project here on the site.  There will be a good dose of experimentation and a lot of new things coming out of my kitchen this fall, all of which will hopefully be put to (eventual) good use.  I can’t divulge just yet what I’m planning, but my goal is that when it’s ready, it will be a great resource for you all on busy evenings.

And now, with no further ado, and a good bit of grumbling: The plan.

Saturday, 9/1: Grilled sausages with zucchini and peppers
Sunday, 9/2: Greek dill chicken with cous cous and vegetables
Make it GF: Substitute quinoa for the cous cous
Monday, 9/3: Labor Day.  Don’t know what we’re doing, but it may involve lobster.
Tuesday, 9/4: Back to rehearsals after a summer off!  Slow cooker night — Mom’s spaghetti with meat sauce.
Make it GF: Use brown rice pasta

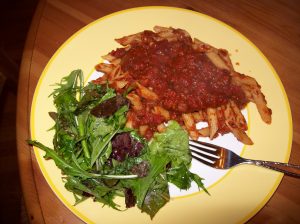
Whole wheat penne with Slow Cooker Meat Sauce, salad

Wednesday, 9/5: Cheddar barbecue turkey sandwiches and fruit
Make it GF: Omit the bread and serve on top of grilled tomato slices
Thursday, 9/6: Spicy pork and vegetable stir fry, brown rice
Friday, 9/7: Fend night
Saturday, 9/8: My folks will be in town.  This usually means that no matter what I’ve planned, they overrule me and provide dinner.  Not a bad deal.
Sunday, 9/9: The folks will still be around, but I suspect we’ll cook today — probably steaks?
Monday, 9/10: Whole wheat pasta with roasted peppers, ham, and mozzarella
Make it GF: Use brown rice pasta
Tuesday, 9/11: Slow cooker — Sloppy joes
Make it GF: Serve the sloppy joe mixture in corn tortillas, over cornbread made with masa, or on top of roasted sweet potatoes
Wednesday, 9/12: Tomato soup and bistro salads
Thursday, 9/13: Fajitas (whether chicken, beef, or shrimp, will be determined by prices at the market)
Make it GF: Use corn tortillas
Friday, 9/14: Fend night
Saturday, 9/15: Parmesan salmon fingers with avocado dip, salad
Make it GF: Substitute crushed popcorn and oats in the breading mixture
Sunday, 9/16: Sunday Roast chicken with vegetables
Monday, 9/17: Pepperoni-spinach calzones
Make it GF: If you don’t want to use a GF pizza dough, then I’d recommend stuffing the filling mixture inside rolled-up slices of eggplant and baking with sauce over the top.

Pepperoni-Spinach Calzone with Homemade Marinara

Tuesday, 9/18: Slow cooker — California chuck roast
Wednesday, 9/19: Chicken hash and fruit
Thursday, 9/20: DIY salad night
Friday, 9/21: Fend night
Saturday, 9/22: White bean and chicken chili
Sunday, 9/23: Zucchini parmigiana
Monday, 9/24: Patty melts and sweet potato fries
Make it GF: omit the bread for the patty melts
Tuesday, 9/25: Slow cooker — Asian lettuce wraps
Wednesday, 9/26: No-fuss chicken, vegetables
Thursday, 9/27: Pasta with pancetta and peas
Make it GF: use brown rice pasta
Friday, 9/28: Fend night
Saturday, 9/29: Potato pancakes with smoked salmon

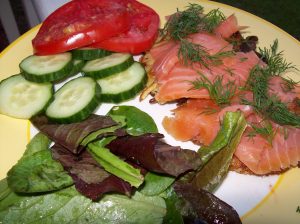
Potato Pancakes with Smoked Salmon, fresh vegetables, and dill

Sunday, 9/30: Beef bourgignon and mashed potatoes

Posted in Accountability, Cooking, Feeding kids, Meal planning | Tagged , , , , , , , , , , , , , , , | 3 Comments

Monday Menus: Lunchbox Edition, Part III

I’m a bundle of nerves.

Tomorrow morning, L. and I are going to his brand-new school for a half-day orientation.  It’s the start of kindergarten.  It’s a BIG DEAL.

I know what he’s wearing – his school will require a uniform, and we got the note from the principal that said he should wear the gym uniform tomorrow due to the summer weather.  I know what he’s bringing – his new teacher emailed us and asked that we bring all the items on the supply list tomorrow, so the kids will be ready to go on Wednesday when they arrive for their very first full day of school.  I know who will be there – we attended a back-to-school social yesterday, so we were able to meet some of the other kids and parents and get the proverbial lay of the land.

We’re as prepared as we can be.  But still, my heart is beating out of my chest with nerves and excitement for my little guy.

Luckily, I have a diversion: It’s time for our third installment of Menu Mondays, the lunchbox edition!  If you’re just catching up, we’ve already covered six meals in the “Easy Bites” category, and six more “Mini-Meals.”  Tonight I’m tackling something that’s purely fun – Stuff in Other Stuff.

So many kids like surprises, and they like food that’s presented in interesting ways.  The recipes in tonight’s Stuff in Other Stuff category are like hiding treasures inside your kid’s lunchbox.  Many of them are super-easy to eat, too, and they’re all based on classic combinations of foods and flavors.  My boys went crazy for some of these recipes.  I hope your kids do, too.

Cheesy Stuffed Potatoes
Lunchipops
Apple Surprise!
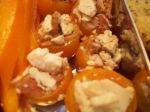
Club Tomatoes
Ham and Cheese Nuggets
Picnic Muffins

Posted in Cooking, Feeding kids, Lunchbox, Meal planning, Parenting | Tagged , , , , , , , , , , , , , , , , | 3 Comments

Guest Post: Three Canning Recipes From My Sister, D.

Ed. Note: Lately, as I’ve been doing my own series on how to preserve summer produce, I’ve received a lot of questions about canning.  I’m not a canning expert and have never tried my hand at it, but my sister, D. — who, in her day job, is a highly respected ancient historian and celebrated professor who enjoys wine, music, sustainable food, and speaking Franglais — took up the art a few years ago and is now my own personal canning guru.  She graciously agreed to take over this page tonight and share some basics with you all.  So without further ado, allow me to introduce my inimitable and much adored sister, D.

Bonjour.

So when my sister asked me to write a guest post for her blog, I was both extremely flattered and very apprehensive.  I’m an academic, people.  Sure, I do a lot of writing in my job, but generally it involves incomprehensible sentences chock-full of polysyllabic words and sprinkled liberally with footnotes.  Lots and lots of footnotes.  It’s all I can do not to add one here.

I certainly can’t hope to match the wit and wisdom of my sister.  So I just hope y’all won’t be too bored.

Seriously, I would never take on B.’s food blogging duties.  For one, I live alone, and generally cook only to please myself.  I flatter myself that I’m a pretty good cook, and I’m certainly interested in food politics, organic farming, and the like, but I don’t invest the time and energy into meal planning, shopping, and sheer creativity that she does.  If I eat pasta four nights in a row, who cares? The only one who’ll know is the cat, and she’s not telling.  Besides, B. can bake me under the table with one hand tied behind her back.  I’ve already requested my birthday treat for this year, although I doubt it will top last year’s talking muffins.

One thing I do do in the kitchen that B. doesn’t, however, is canning.  I’ve no doubt that in a year or two, when L. and P. are in school full-time, I’ll lure her over to the dark side, but until then I’m on my own here.  And since she’s been getting a lot of canning questions lately, she asked me to chip in with some of my favorite tips and recipes for preserving the best foods of summer.

The first thing I want to say is that canning is not nearly as intimidating as most people believe.  We have this mental image of flushed, sweaty women in aprons hovering over steaming pots for days in the middle of summer, surrounded by piles of produce and pyramids of glass jars.  Sure, there can be some of that – canning can take place on whatever scale you want it to, and if you have 14 acres of zucchini, I’m not judging you – but increasingly there are recipes for small-scale canning, many of which can be done in the smallest of kitchens (I live in Brooklyn, for God’s sake.  My kitchen is smaller than most people’s closets) and with a relatively minimal investment of time.  Nor do you have to invest a ton of money.  Ball jars are cheap and readily available, and you can get a basic canning kit, complete with recipe book, at many hardware stores or online for less than $75.  My personal favorite recipe guide is Well-Preserved: Recipes and Techniques for Putting Up Small Batches of Seasonal Foods by Eugenia Bone, but the Ball Blue Book (which comes with many canning kits) is also great.

It doesn’t even have to be all that complicated.  Preserving in jars comes in two varieties: boiling-water canning and pressure canning.  Boiling-water canning is generally where most people start, mainly I think because you don’t need a pressure cooker/canner to do it.  The difference between the two depends on the pH value of the product.  Low acid foods – most vegetables, meats, fish, soups, etc. – need either to have acid added or to be pressure-canned, to make sure all the bacteria are killed.  Other foods, such as fruits, jams, and some tomato recipes, have enough acid in them so that they can be accomplished simply by processing your filled jars in boiling water, which will raise the temperature of the contents enough to kill any nasty organisms.

But one thing you have to do is follow the recipe and the directions, both to make sure the jars seal properly and to make sure that you have the appropriate acidity level and processing time to render the finished product safe for storage.  Luckily I’m good at reading and following instructions, so this is right up my alley.  I have never – not once – had a jar not seal properly, although I have friends who have had a dud here or there.

Some helpful hints before I get to sharing a couple of my favorite canning recipes (although I’m going to stick to boiling-water canning for right now; if my sister asks me back, who knows?).  First, lay out everything you’re going to need – ingredients, jars, tools, etc. – before you start.  In cooking this is called mise en place, and it speeds things up exponentially.  In canning this is a matter of survival, as you don’t want to be juggling scalding-hot jars when you’re reaching for your tongs, or worrying over the rapidly-cooling contents of your jars while you wait for the sealing rings on your lids to soften.  I read all my recipes, even the ones I’ve made multiple times before, through at least twice before starting the process.  Second, the quality of what you put into the jar results in the quality of the end product.  Sure, you can process up the tomatoes that are half-rotted, munched on by bugs, or sort of sickly looking (and I know people who do), but for me the whole point is to preserve the best of the summer’s produce so that when you’re making sauce in the middle of January, you don’t have to resort to tomatoes that are pale orange, have a carbon footprint the size of Alaska, and taste like Styrofoam.  Third, I always have at least one extra jar and lid combo on hand, sterilized and ready to go when I’m canning.  The guidelines on what the recipes make are a “best guess” sort of thing; if your produce had more water, or if it didn’t cook down quite enough, or any number of other things, you might end up looking at enough perfectly good food in the bottom of your pot to fill an extra jar or two, and it’s just a shame for it to go to waste.

OK, ready?  Here we go: crushed tomatoes, strawberry-balsamic “jam” (I think it’s more like a compote, but the recipe calls it jam), and blueberry pie filling!
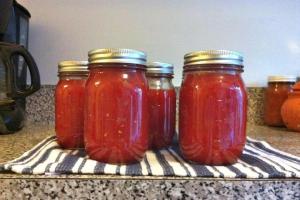
Crushed tomatoes

Crushed Tomatoes (recipe from Eugenia Bone’s Well Preserved; directions somewhat adapted by me)

INGREDIENTS
6 to 8 pounds ripe, unblemished tomatoes, unrefrigerated
6 tsp. salt
1 ½ tsp citric acid, such as Fruit Fresh

1. Score the bottom of your tomatoes with an X.  Bring a large pot of water to a boil.  Drop the tomatoes into the boiling water for 10 seconds and then remove.  The skins will now remove easily.  Drop the skins into a colander set over a large bowl.

2. After you have peeled the tomatoes, core them and slice in half.  Squeeze out the seeds over the colander with the skins (a lot of tomato juice is saved this way.  Eugenia suggests either adding it to the canning process or using it for Bloody Marys.  I add it to my tomatoes).

3. Add the peeled, seeded tomatoes to a large pot.  Crush the tomatoes using a food processor, potato masher, or just your hands.  A few chunks are fine.  Heat the crushed tomatoes and boil gently for 5 minutes; if they get a bit foamy on top don’t worry.

4. While the tomatoes are boiling, scald 6 pint jars and their bands (since you will be processing them more than 10 minutes, they do not need to be sterilized, only scalded by dipping in boiling water).  Simmer the lids in a small saucepan of hot water to soften the seal.  Prepare the scalded jars by adding 1 tsp. salt and ¼ tsp. citric acid into the bottom of each.

5. Ladle the hot tomatoes into each prepared jar, leaving ½ to ¾ inch of headspace.  Wipe the rims with a clean, damp cloth, set the lids, and screw on the bands fingertip tight.

6. Place the jars into a large pot filled with water to cover the jars by about 3 inches.  Bring the water to a boil and process the tomatoes for 40 minutes.  Since the tomatoes process for such a long time, this can be a problem if water splashes out during the processing.  If at any time the tops of the jars are not covered with water, you need to delete the time the jars were not totally submerged, add water, bring back to a boil, and begin timing again, making sure to restart the timer from the last time at which the jars were totally covered.

7. Turn off the heat and let the jars sit in the water for 5 minutes or so.  Remove the jars and let them rest on a dish towel on the counter.  Cool for 8 hours or so.  When jars are completely cool, check the seal by removing the bands and attempting to lift the jars by the flat lids.

Strawberry-Balsamic Jam (recipe from Eugenia Bone’s Well Preserved; my friends refer to this as “strawberry-balsamic crack”, and eat it on everything from goat cheese to ice cream.  Depending on how vinegary my balsamic is, since taste can differ among various brands, I sometimes add just a touch more vinegar.)
Makes 6 half-pints*

INGREDIENTS

8 cups washed and hulled strawberries (about 1 ½ pounds), halved if large
5 cups sugar
½ tsp. unsalted butter
5 tablespoons balsamic vinegar

1. Pour the strawberries into a large, deep pot and bring to a boil over medium heat.  Once they are boiling, add the sugar and stir until it is dissolved.  The sugar tends to burn on the bottom, so keep it moving until it is thoroughly dissolved.  Bring back to a boil and add butter.  Turn the heat down to medium low and boil gently for 40 minutes, until thickened into a soft, loose jam.  Stir in the balsamic vinegar.

2. Bring 6 half-pint jars and their bands to a boil in a large pot of water fitted with a rack.  Boil for 10 minutes.  Remove the jars from the water.

3. Bring the lids to a simmer in a small pan of water to soften the seal (do not boil).

4. When jars are dry but still hot, ladle strawberries into the jars, leaving ½ to ¾ inch of headspace**.  Wipe the rims clean with a damp cloth, set the lids, and screw on the sterilized bands fingertip tight.

5. Place the jars on a rack in a large pot and add enough water to cover by three inches.  Cover and bring to a boil over high heat, then lower the heat and continue to boil the jars for 10 minutes.  Remove the cover.  After about 5 minutes, remove the jars and allow them to rest on a dish towel on the counter for about 6 hours or until cool. You may hear them making a pinging sound as the lids seal.  Test the seals by removing the rings and lifting the jars by the flat lid.  If the lid releases, the seal did not form.  Unsealed jars need either to be reprocessed immediately or refrigerated and used within a month.

*If you’d rather use pint jars instead of half-pint jars, process them for 15 minutes instead of 10.

** Eugenia Bone suggests removing the strawberries with a slotted spoon, and canning the leftover syrup separately.  I like to keep the strawberries and syrup together, which generally necessitates more jars.  The final product when I make it is then less jam-like, but makes a great topping for things like ice cream, with its combination of fruit and syrup.
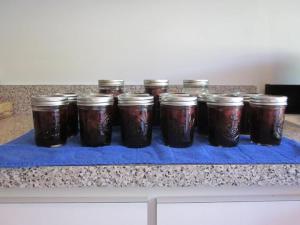
Ed. Note: She is not kidding. This stuff really is like crack.

Blueberry Pie Filling (directions adapted by me; recipe from the New York Times)
Makes 2 quarts

INGREDIENTS
1 cup sugar
1/2 cup cornstarch
Juice of two lemons
4 pints blueberries
1 teaspoon almond extract (optional)
4 tablespoons Grand Marnier or other orange liqueur (optional)

1. Fill your boiling water canner with water, about 2/3 full, and bring to a boil.  Add 2 one-quart Ball jars to your canning rack, lower into the water, and boil for 10 minutes to sterilize (or, if you have a dishwasher – lucky you! – run the jars through a dishwasher cycle, leaving them in the machine until ready to fill).  Leave the jars in the pot of warm water.  You can put the rings of your two-part lids in this pot as well.

2. Bring a small saucepan of water to a boil.  Turn off the heat and add your lids to soften the rubber gaskets for sealing.

3. In a large heavy pot combine the sugar, cornstarch, and lemon juice with one cup water and whisk until smooth.  Bring to a boil and add blueberries; the mixture will look gloppy.  Smash some of the berries with the back of a spoon and return to the boil for one minute.  Add the extract and liqueur, if using, and stir well.

4. Remove the warm jars from your canner and bring water back to a boil.  Ladle hot filling into the jars, leaving one inch at the top (filling should be just about up to the base of the neck).  Wipe the rims clean with a damp cloth, place lids on jars, and screw the rings on fingertip-tight.  Place jars back on the rack in your canner and lower them into the boiling water.  If the water does not cover the jars, add more until they are completely submerged.  Process the jars in boiling water for 30 minutes (if you have to add more water to cover the jars, start timing from when the water comes back to the boil).  Remove jars from canner, place on a towel and allow to cool for about 12 hours.  You may hear them making a pinging sound as the lids seal.

5. Test the seals by removing the rings and lifting the jars by the flat lid.  If the lid releases, the seal did not form.  Unsealed jars need either to be reprocessed immediately or refrigerated and used within a month.  If you need to reprocess the jars, the jar and ring part of the lid can be reused, but you’ll need to replace the center lid.  To reprocess, reheat the filling to boiling point (as in Step 3) and then continue as before.

Posted in Cooking, Food culture | Tagged , , , , , , , , | 1 Comment